How to Origami — Velociraptor Edition
May 12, 2022
This Week’s:
Historical Fact — The system by which all diagrams show origami folds, known as the Yoshizawa-Randlett system, was first described in Samuel Randlett’s “Art of Origami” in 1961 – only 61 years ago (All About Japan).
Fun Fact — “Modular” or “unit” origami uses multiple pieces of folded paper to form a larger final construction, while “wet folding” introduces curved shapes, and “action origami” refers to toy-like origami, like jumping frogs (All About Japan).
Featured Origamist — Tomoko Fuse, who was considered by many as the master of unit origami. She was born in Niigata, Japan, in 1951, and learned origami as a child while in a hospital. She started publishing in 1981 and has over 60 origami-themed books in several different languages including, at the very least, Japanese, English, Korean, and Italian. Besides that, she has also been the author of numerous origami designs, including boxes, kusudama, paper toys, masks, modular polyhedra, as well as other geometric forms and objects, such as origami tessellations. (Tomoko Fuse).
Featured Works- Sipho Mabona’s life-sized origami elephant, folded from a single piece of paper. Images of this piece can be found on this website.
Tip — Sometimes, people may try to say that there is a right or wrong way to do origami, but there is neither a “right” nor “wrong” way. Let the ideas run wild – the best art is made that way.
Velociraptors: the tiny warriors of the dinosaur world. Known for their tiny size but vicious nature, velociraptors are among some of the most famous and favorite dinosaurs of many. And so it is only fitting that these tiny terrors would have great paper replicas. Besides, who does not love a tiny dinosaur?
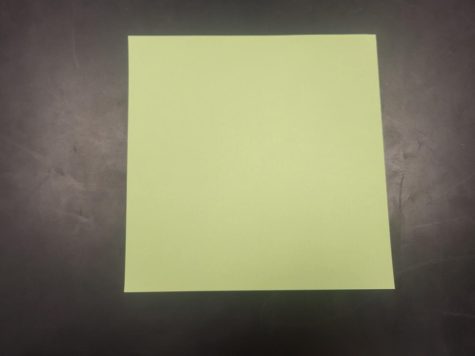
For this mini velociraptor, origami paper was used; origami paper is recommended, and can be found on places like Amazon or in some stores, but can also easily be made from regular paper with just scissors, if none is available. If anyone is interested in the series, make sure to check out either the first installment or this latest one.
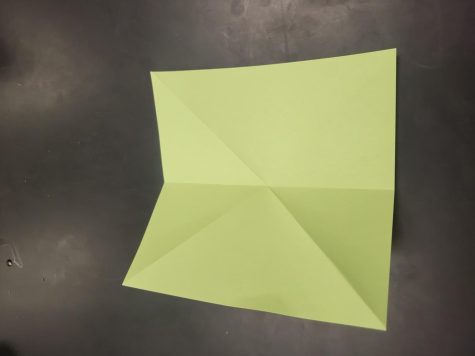
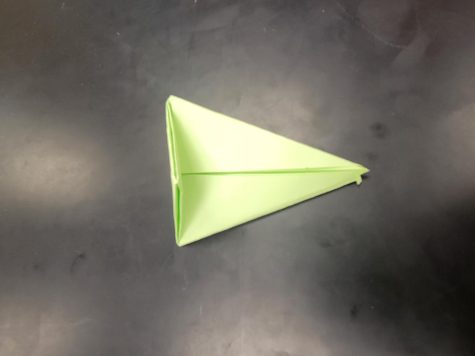
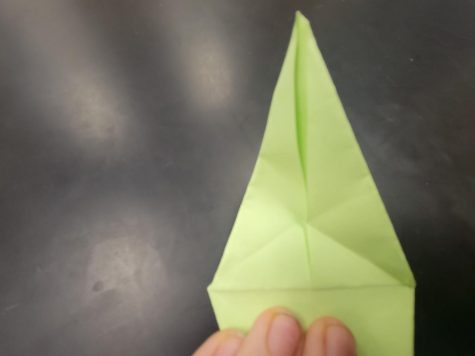
First, start by folding the paper on both diagonals.
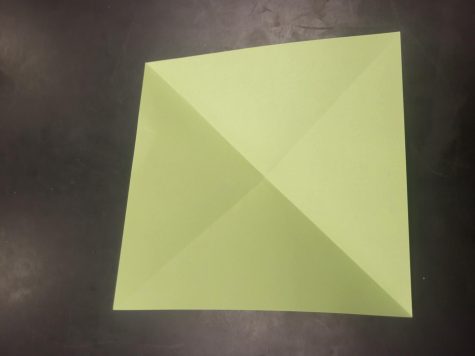
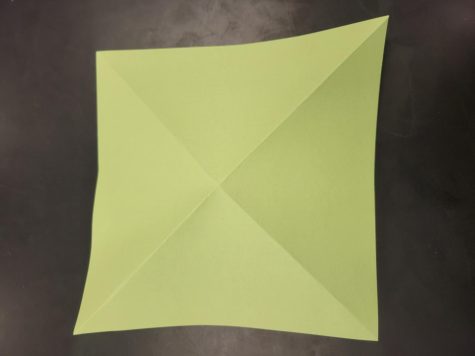
Next, unfold and flip the paper over.
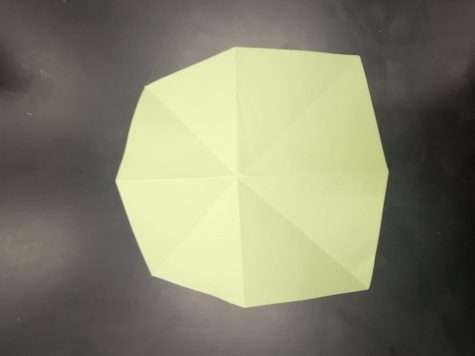
Proceed to then fold the paper up and in half.
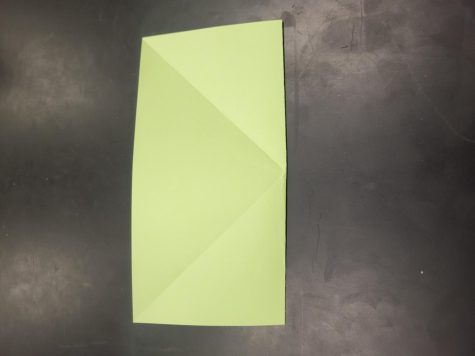
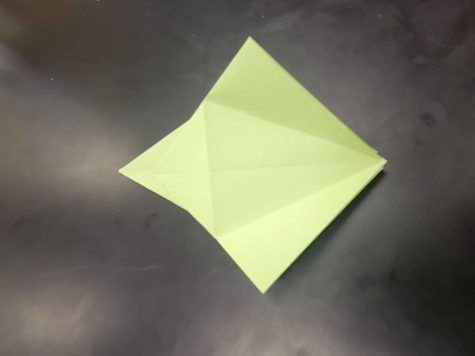
Next, unfold the paper, turn it sideways, and fold up again, so that there are four folds: two on the diagonals and two making a square in the middle.
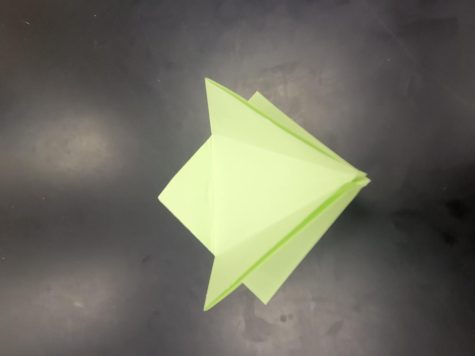
Then flip the whole thing over again, so that the paper is folding down a bit.
Pinch the sides and push in, so that there are four sides. Flatten it so that two of the flaps are on each of the two sides and lay it down.
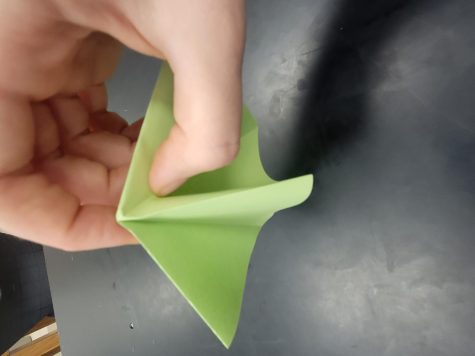
Proceed to take one side and fold the edge into the middle. Do the same with the remaining sides.
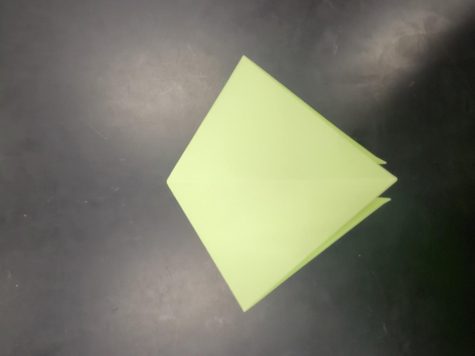
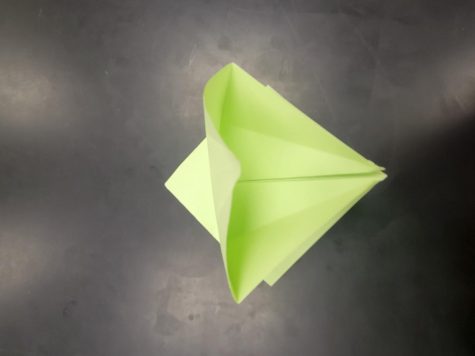
Then fold the tiny triangle on top down as far as it can go, flipping it over and doing the same on the other side.
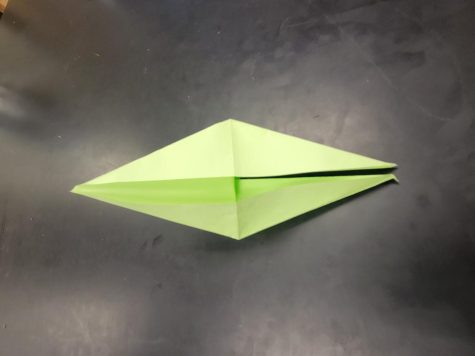
The unfold the flaps and the triangle, and open up the structure until the triangle at the bottom like so.
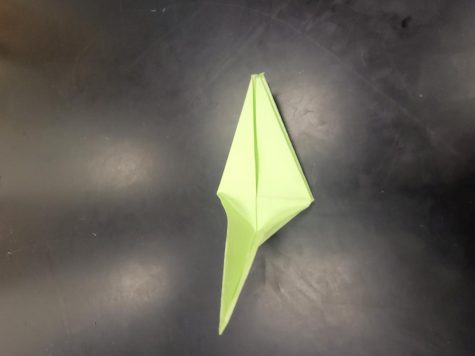
Proceed to push the two sides inward and fold until it looks like a long diamond. Flip it over and do the same to the other side, so that the triangle is in the middle.
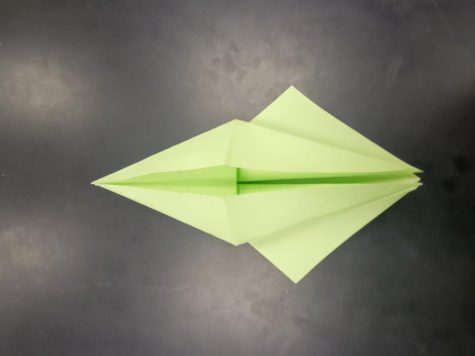
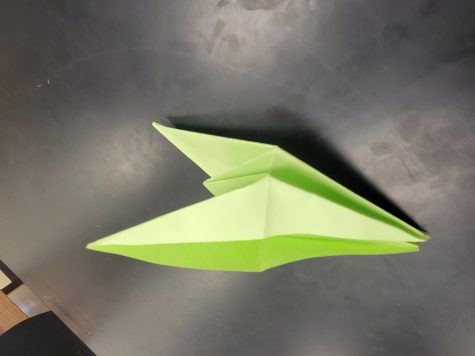
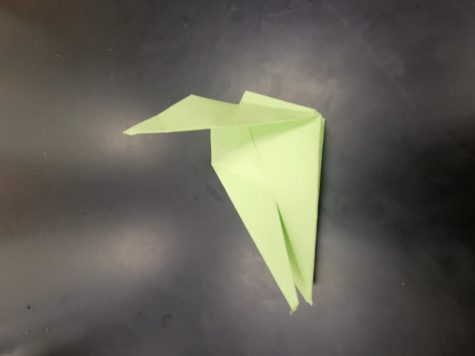
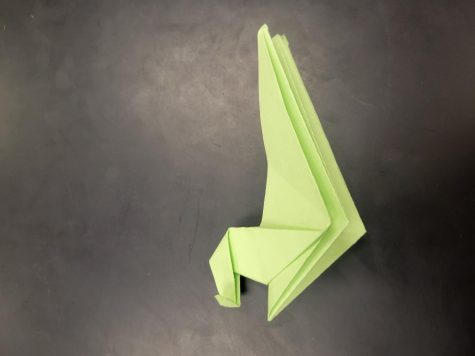
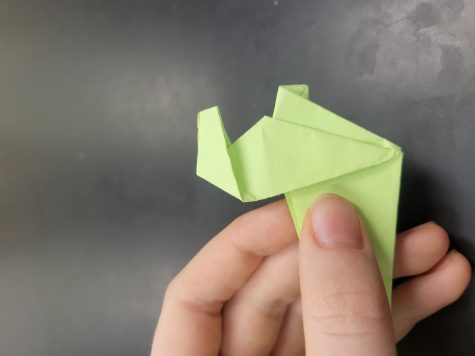
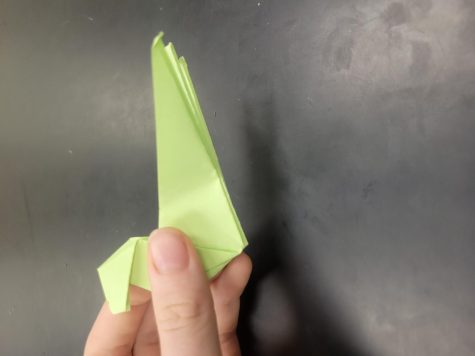
Next, take the top flap and fold it down until the triangle and diamond behind it are visible.

Then turn the paper until the triangle is pointing left. Flip the whole thing over, take the left flap, and fold to the center, only creasing about halfway down.
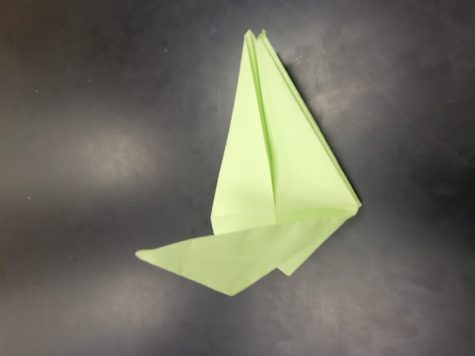
Then unfold, turn to the other side (not flipping, just turning), and do the same thing. This should make it so there is a point in the middle where the creases meet.
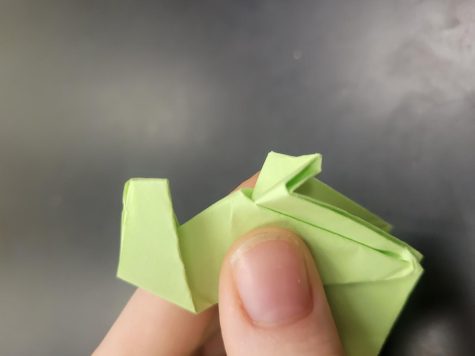
Take both sides of the crease and push inwards. Then let go, take the body, and fold the halves down, so that there is a long triangle on top.
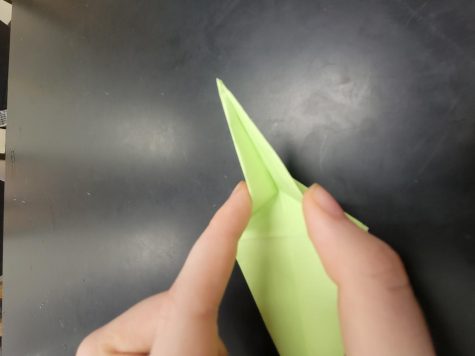
Then take the long triangle and fold it down and over to one side. Then flip it and re-crease it (do not make a new crease, follow the old one).

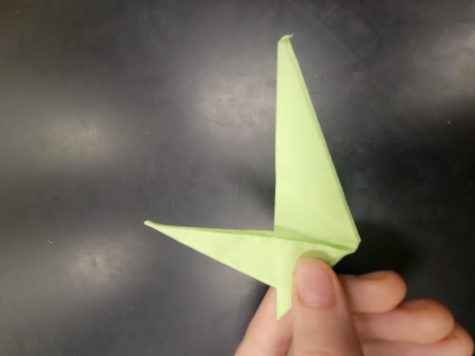
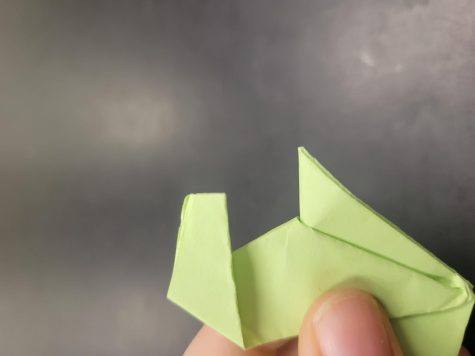
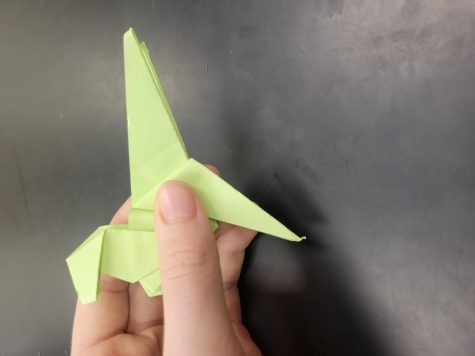
Next, unfold and then open up the triangle, pushing in on the point until it reverses. Make sure it folds to make a triangle – this will be the head.
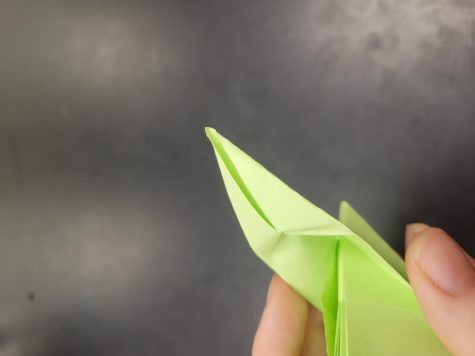

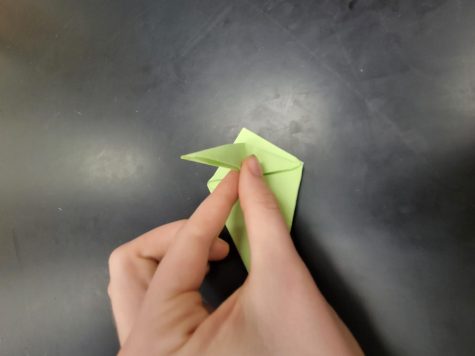
Then take the tip of the head and fold it about just like before, creasing on one side and then following the crease on the other.
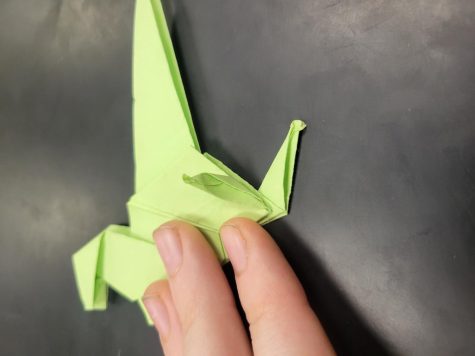
Then open up the head from the bottom and push the crease until it reverses and makes a more velociraptor-like head (square on the end).
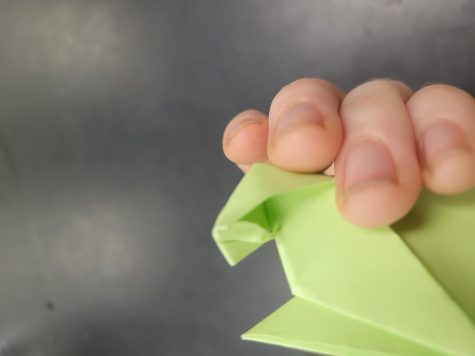
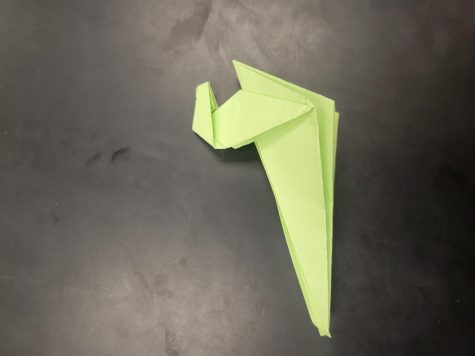
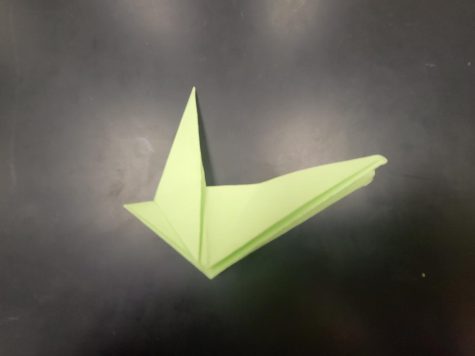
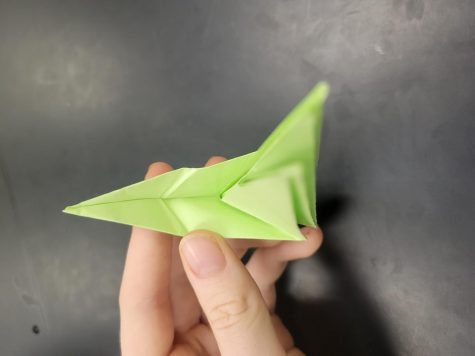
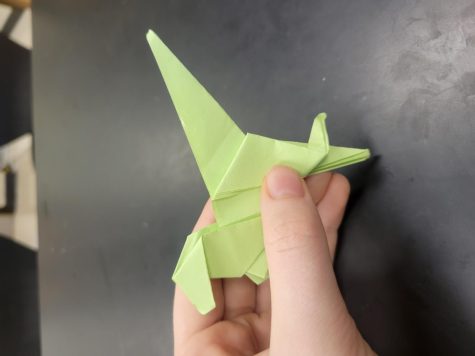
Next, take the tiny arms on the velociraptor and push the tip of the paper down until tiny hands are on the arms.
Proceed to look at the flaps making up most of the body. There should be three – grab one and fold it down very close to the body (but not too close). This closeness will help stabilize the origami when it stands.
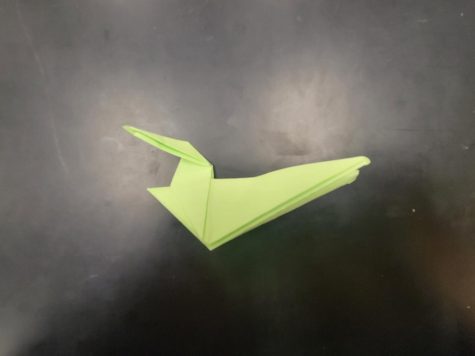
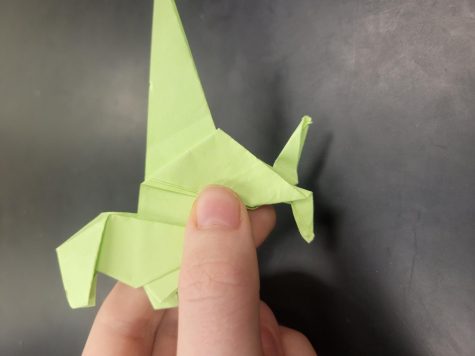
Next, take the bottom of the leg and fold it under and back like so both ways.
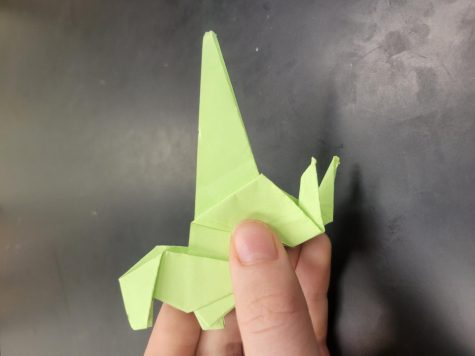
And then take that triangle and push it in until a foot (facing the correct way) emerges.
Finally, balance the tiny velociraptor and enjoy.
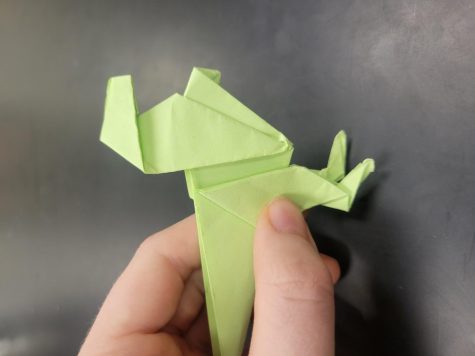
And then it is done. I hope that today’s tutorial was enjoyable, and for success in any future origami endeavors. Have a great rest of the school year and summer break.
Today’s tutorial was originally made in June on Youtube, 2016, by PPO. Click here for the original video.