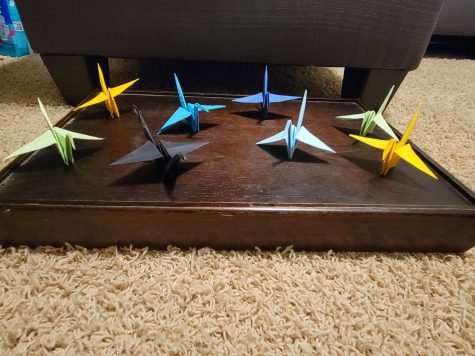
How To Make An Origami Paper Crane
December 9, 2021
This Week’s:
Historical Fact — The first known origami was paired butterflies, put on sake bottles at Shinto weddings and meant to represent the bride and groom. They were first mentioned in a poem by Ihara Saikaku in 1680 (Kanert).
Fun Fact — The largest origami lei consisted of 330,380 cranes, all folded by the residents of Okinawa City in Japan on September 7th, 2017. It measures 9,775.33 meters or about 32,071 feet in length (Guiness Book of World Records).
Featured Origamist — Akira Yoshizawa. He is considered to be the inventor of modern day origami, changing it from a craft to an art with his books, of which he has at least seven. Due to his work in restoring the art, he was granted the title “Knight of the Order of the Rising Sun” by Emperor Hirohito in 1983 — one of the highest honors that can be presented to a Japanese citizen (Guenther).
Featured Work — “Year of the Sheep,” made by Joseph Wu for the then-upcoming 2015 New Year. This piece can be found in Montecristo Magazine.
Tip — Fold as neatly and precisely as possible to get the best results; a clean fold leads to crisp lines and sharp edges, which are vital when making simple and clean designs such as an origami crane (K’s Origami)
What better way to start off a how-to origami series than with a paper crane? I only felt it right — given that one of the oldest remaining written documents, and the oldest written guide about origami, is about them (Rosemary). Cranes, or tsuru, in Japanese, have huge historical and cultural importance in Japan. As Mark Brazil on JapanVisitor.com wrote, “The mythological tsuru is a fortunate creature indeed, not only is it revered as the bird of happiness, but it is also considered to live for a thousand years.”
Due to this longevity and importance, it is no wonder cranes, even in paper form, are said to be great. Brazil continues, explaining that, “The challenge of completing a lei of one thousand folded paper cranes is a great one, but said to be rewarded with a wish. In particular, folding a thousand paper cranes on behalf of a sick person indicates the maker’s concern and care for the sick person.” Paper cranes are also sometimes given as a wedding gift from a father to his daughter — a symbol wishing the couple a thousand years of happiness.
The creation of the crane itself is, although a bit of a longer process, not a difficult one, and should be easily completable within five to ten minutes. It is usually categorized as an easy fold, due to its relatively uncomplicated folds. This is only one way to make an origami crane — and no way is right or wrong, just different. For the crane itself, although origami paper is recommended, it is not required. Origami paper can be found on places like Amazon or in some stores, but can also easily be made with just a regular piece of paper and scissors.
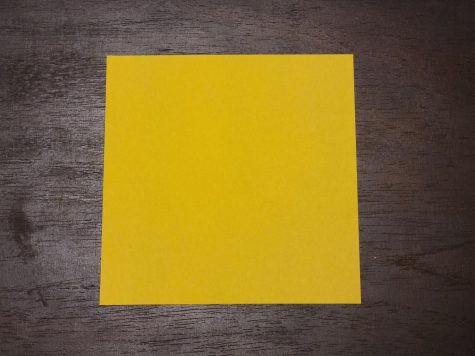
First, start with just a sheet of origami paper. This time I chose yellow, but color doesn’t particularly matter.
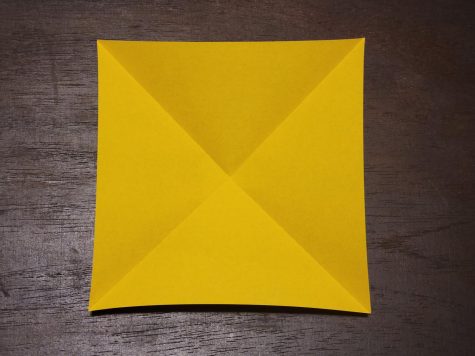
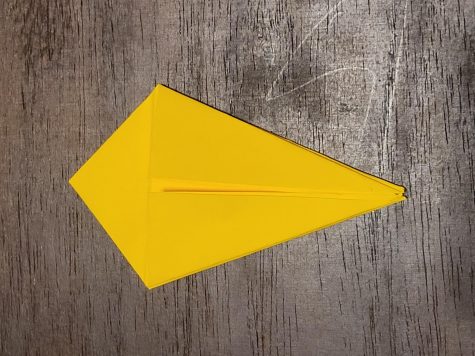
Next, I fold the paper diagonally, both ways — it does not matter the order. Then I flip the paper over.
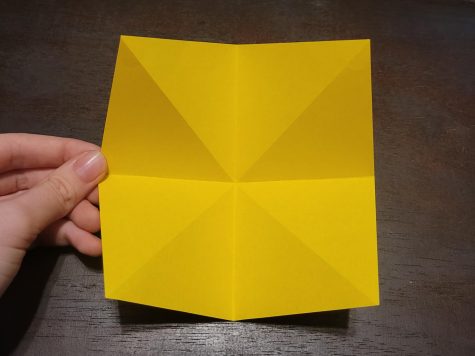
With the flipped paper, fold it in half hotdog style from the right to the left and the top to the bottom, until it looks almost like an asterisk (*) symbol.
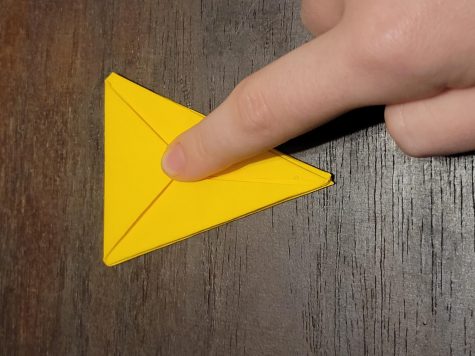
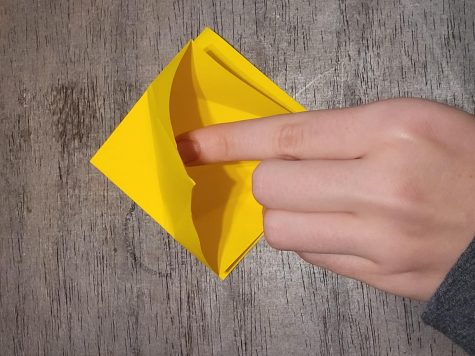
Next, pinch the triangles on either side of the middle fold together and push in until it looks like a diamond.
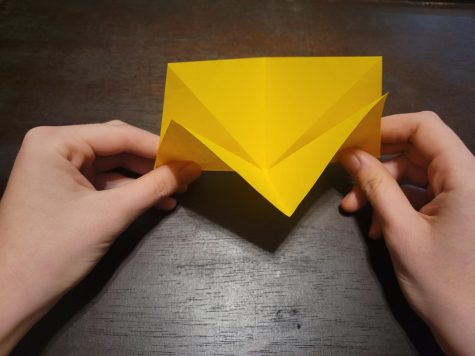
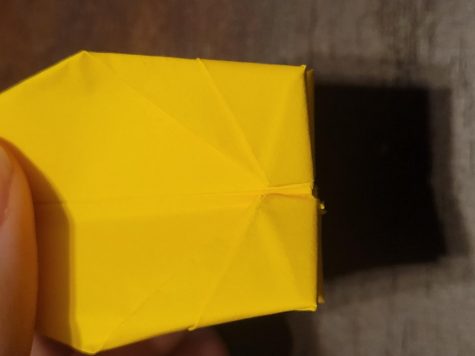
Then make it into the shape of a flat diamond, equal on both sides with the amount of folds. After that, make sure the point where all the sides connect is on the top.
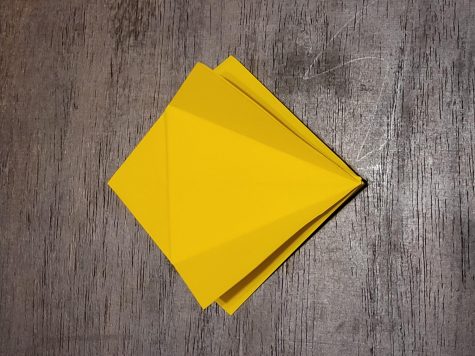
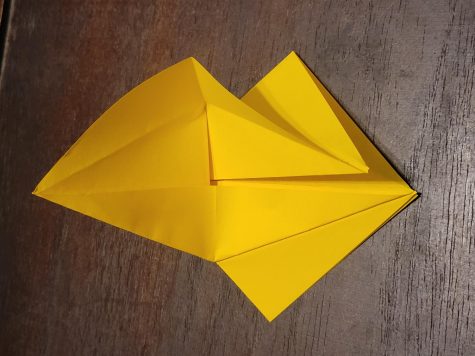
Proceed to then fold the edge of the square, from the bottom, to the middle crease. Repeat this step 3 more times, until the finished product looks like a kite.
Then fold the top triangle of the kite forwards and then backwards, leaving it in the same position it started in.
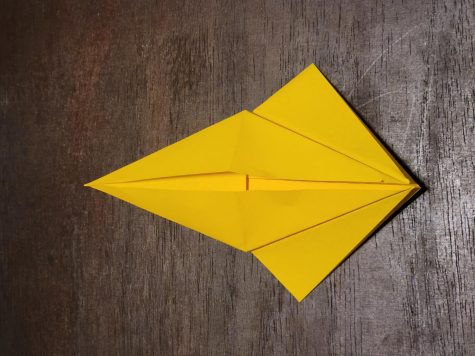
Then unfold what was done, until it looks like a diamond again, just with more creases this time.
Proceed to then lift just one single piece of the paper up to the top triangle, and fold the triangle inward to the middle until it looks like a half of a long, skinny diamond. Do this on both sides until it looks like a skinny diamond with legs on the bottom.

Then fold, from the bottom again, to the middle on all of the sides until uniform.
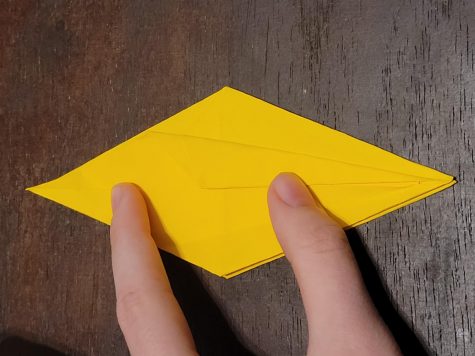
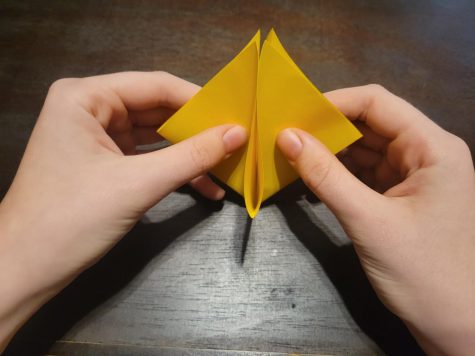
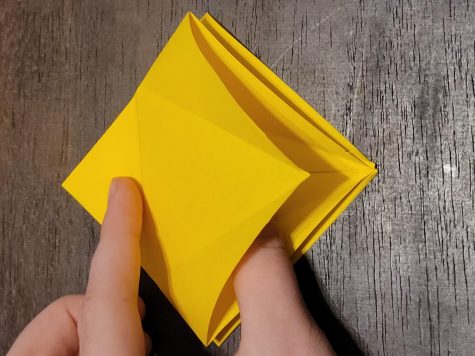
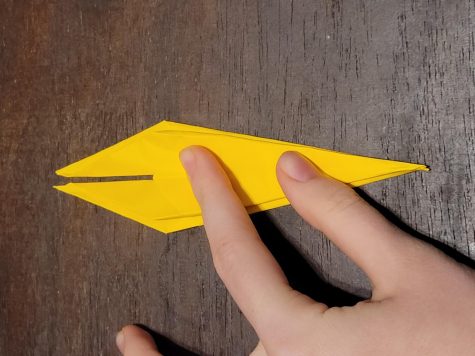
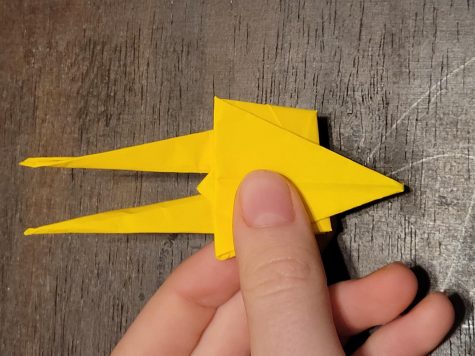
Next pinch the two sides of both the sides together until it looks like the photo below
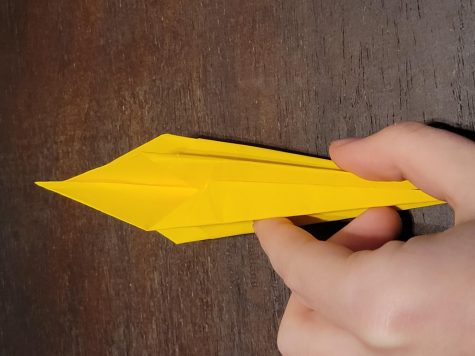
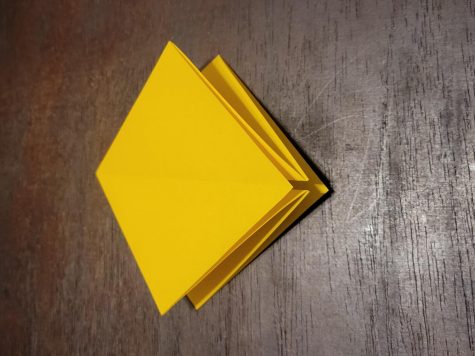
Then take one of the legs and fold up until the faint crease that should be in the upper half of the diamond. Repeat on the other side.
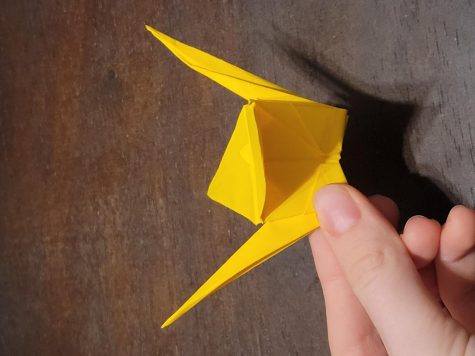
Proceed to pinch the sides of the crane towards you, one half at a time, until you can look on either side of the crane and see this fancy kind of pattern.
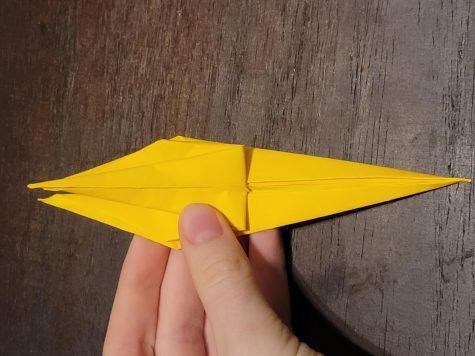
Next, fold the wing down to where the pattern starts on both sides and then lift again.
Then proceed to pull out the long spikes as far as you want and pinch at the bottom.

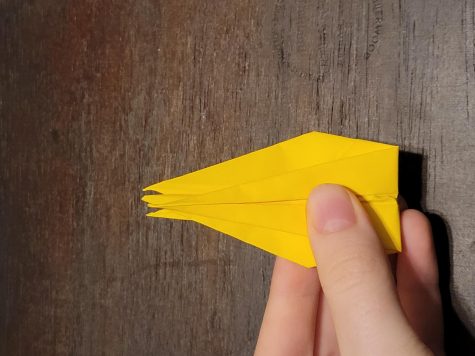
And, finally, choose which spike is the head, go down about a fourth of the way from the top, and push in and pinch together to create the head.
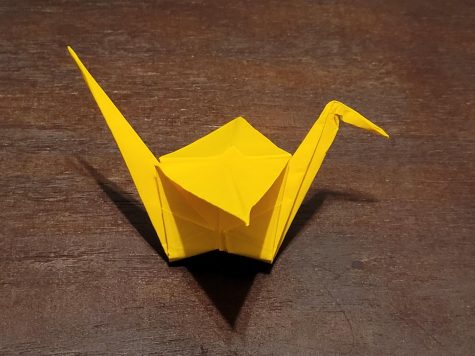
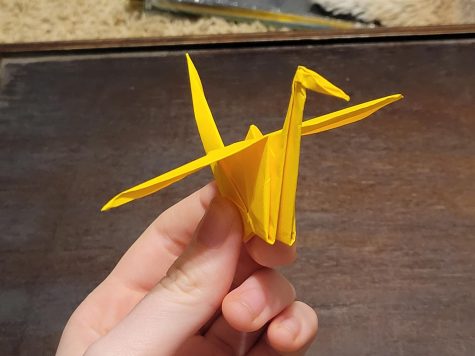
And we are done. Congratulations, you now have a paper crane. Only 999 more to go…
I hope that you have enjoyed today’s tutorial, and that you find success in any future origami endeavors. Tune in for the next tutorial to find out how to make an origami shark.
Today’s instructions were sourced from a Youtube video made in 2014 by Origami Tsunami. Click here for the original video.